How to use post targeting
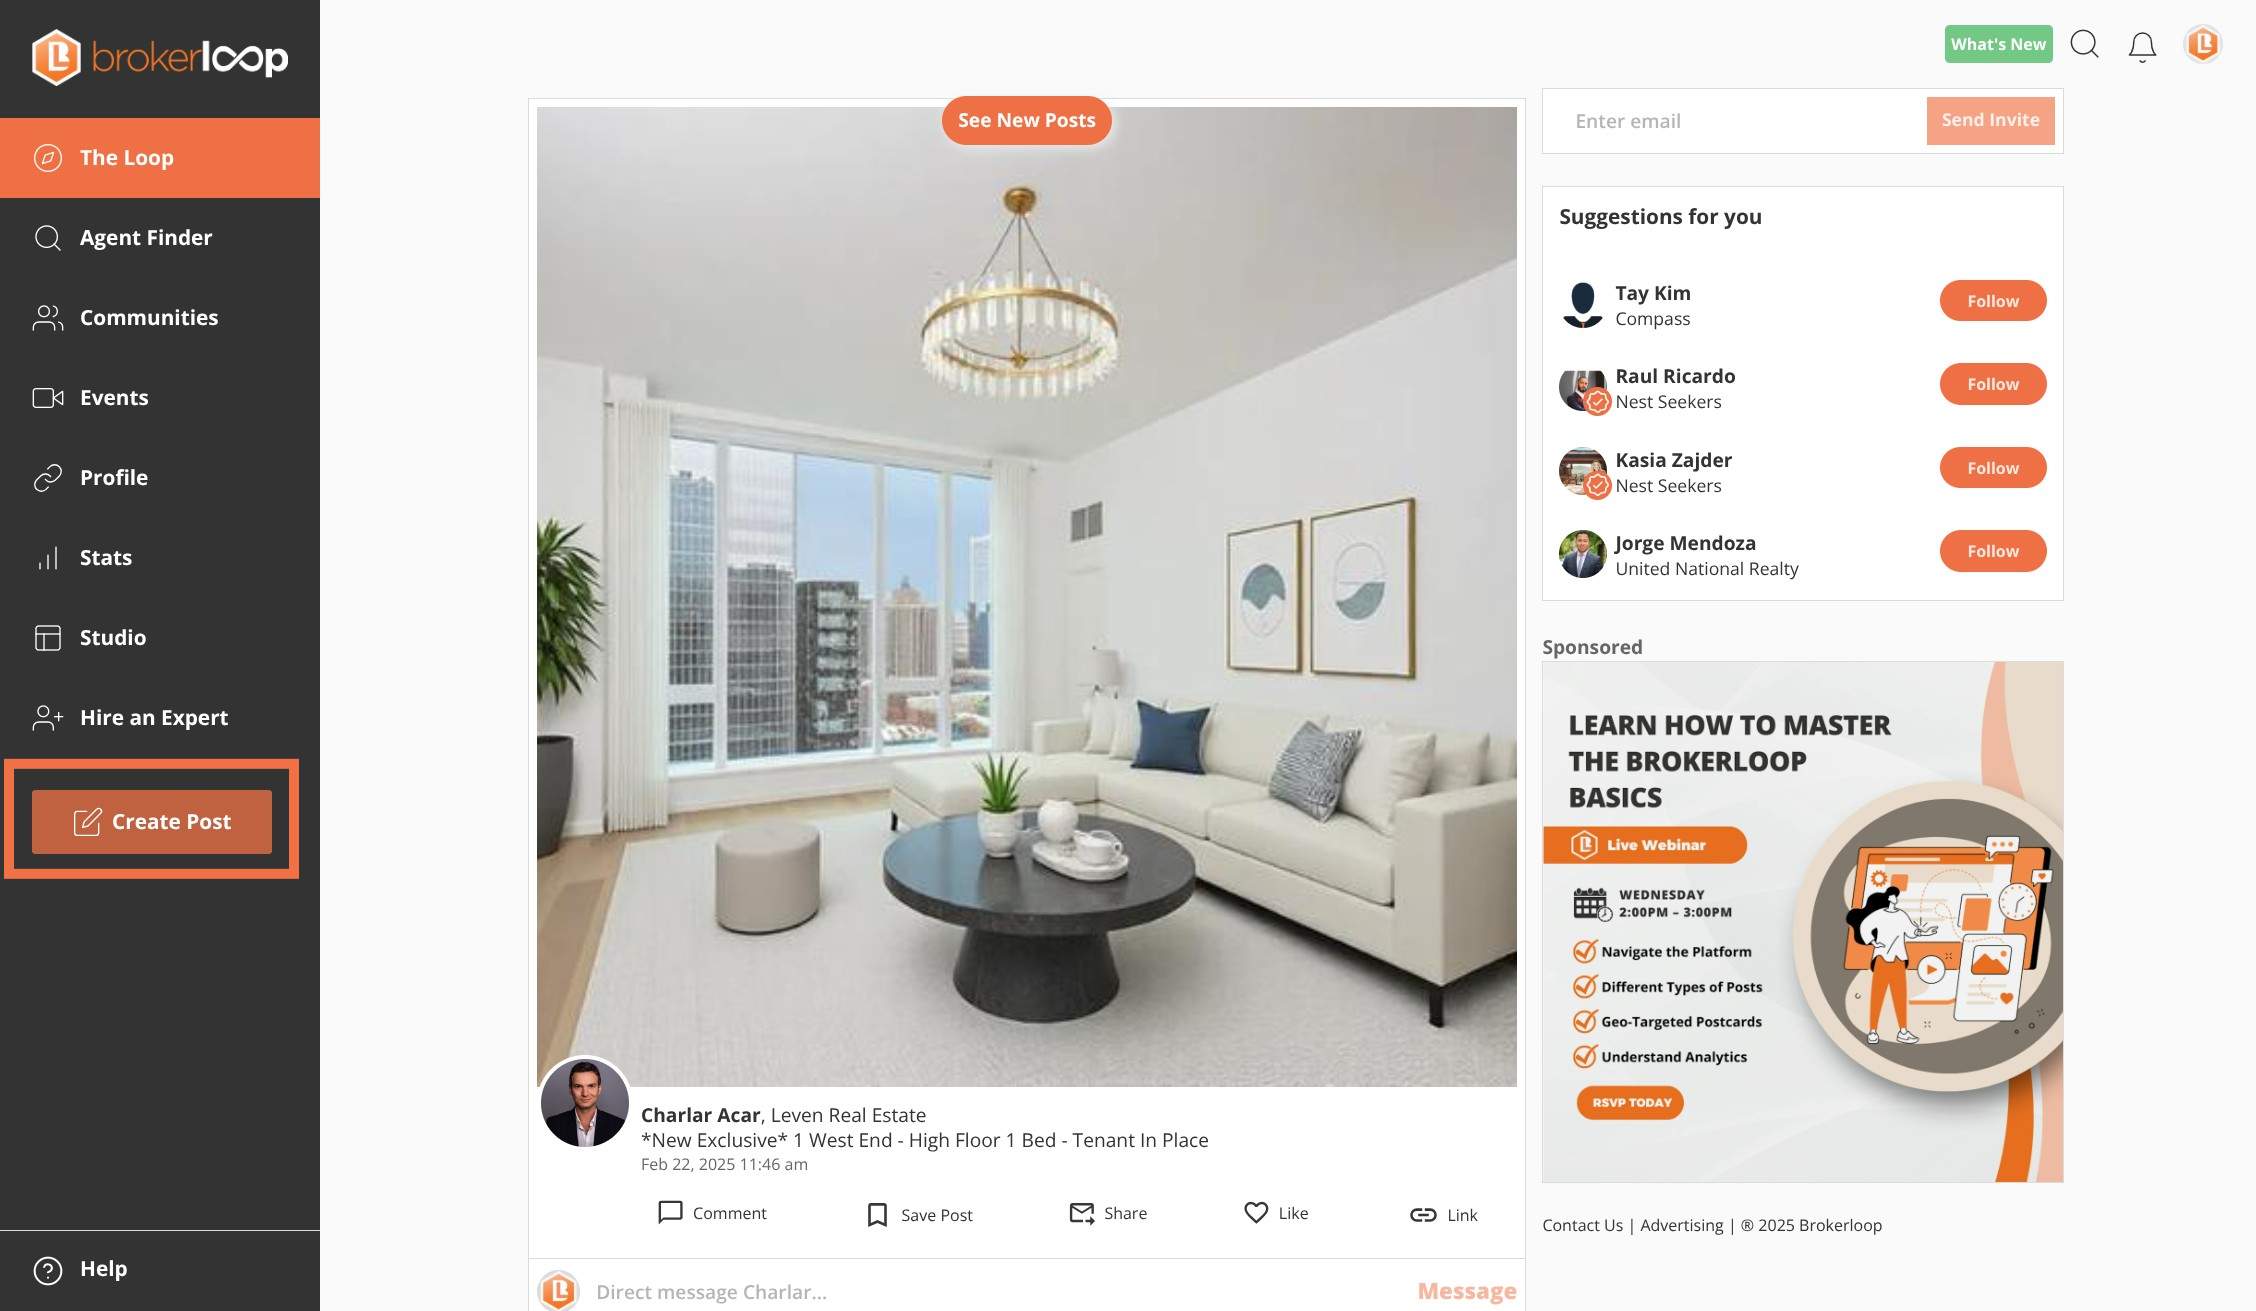
Step 1: Click Create Post
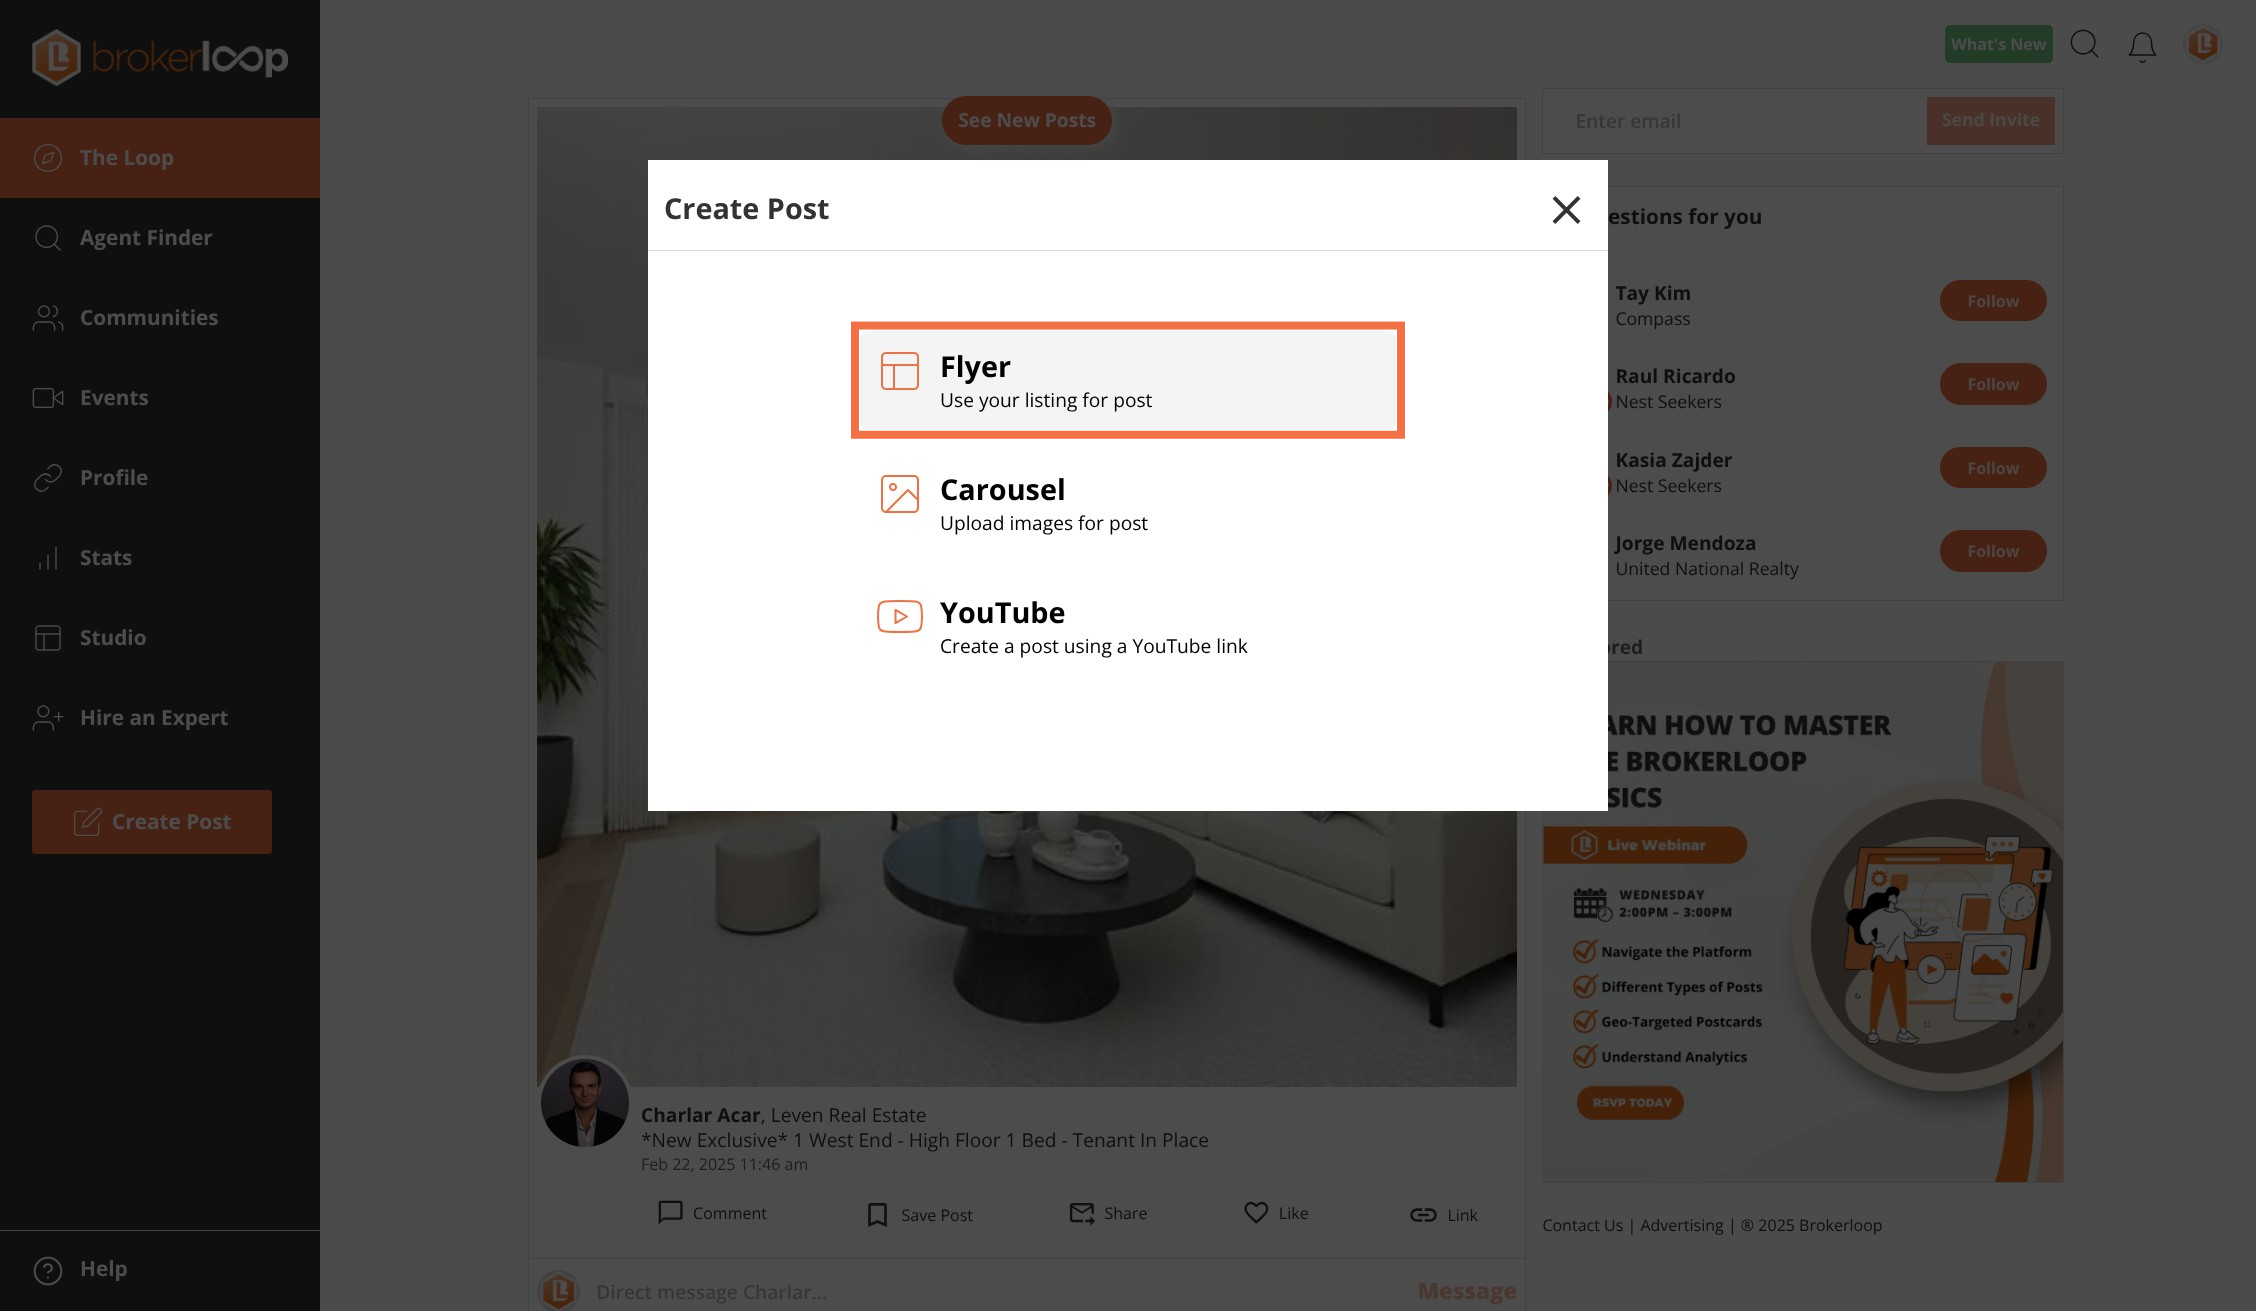
Step 2: You can create targeted posts using Flyers, Carousels and Youtube videos. This example we will use a Flyer
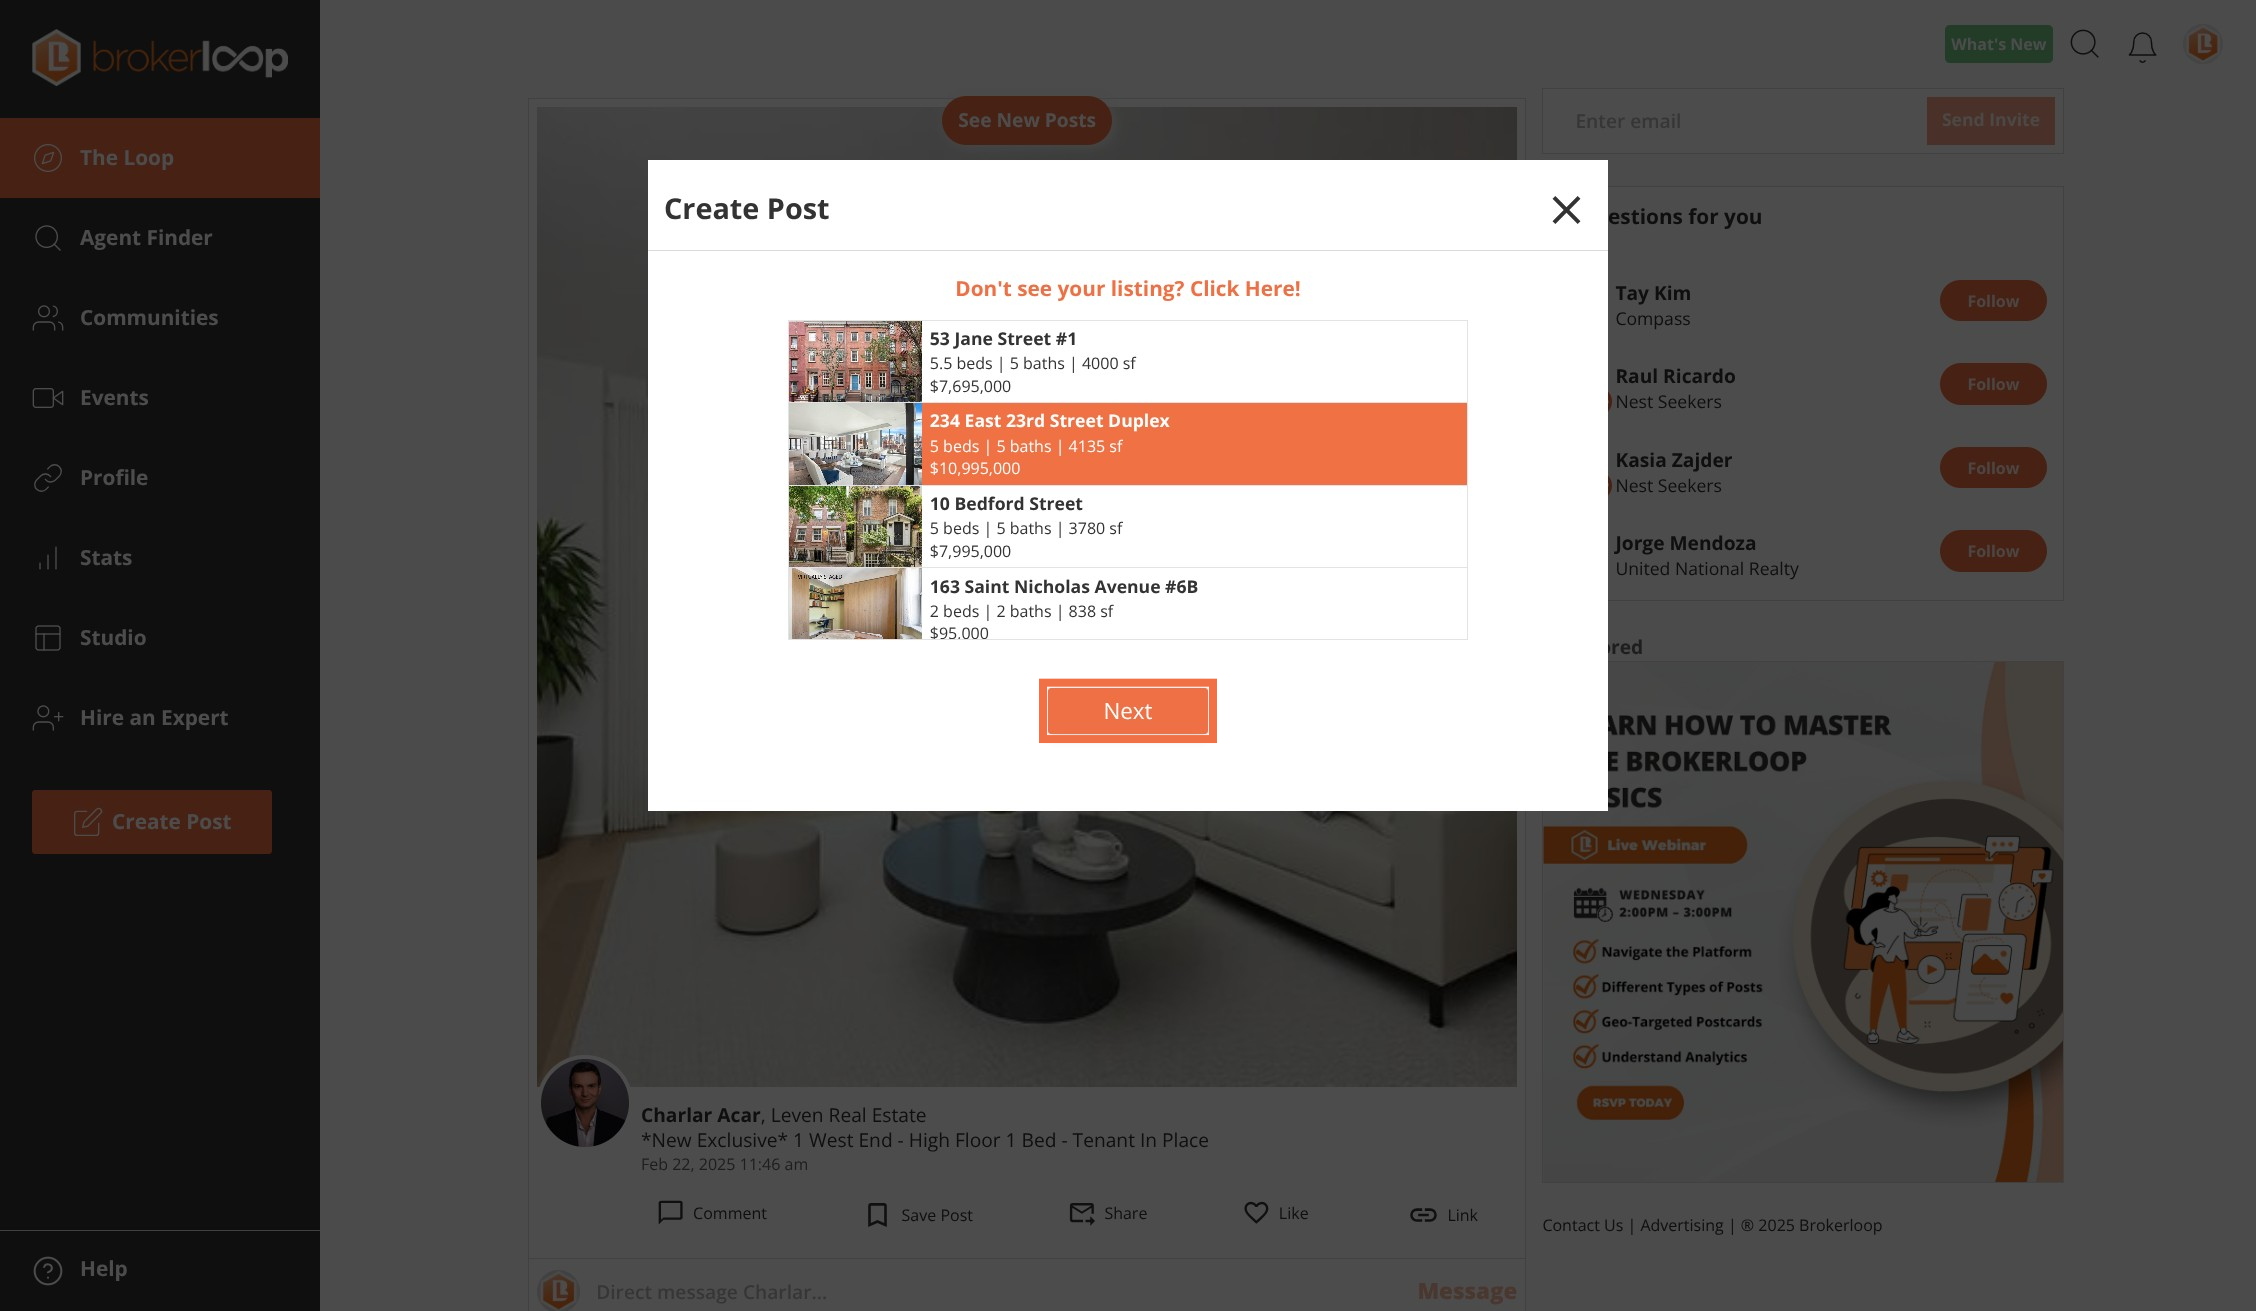
Step 3: Select your listing then click the next button
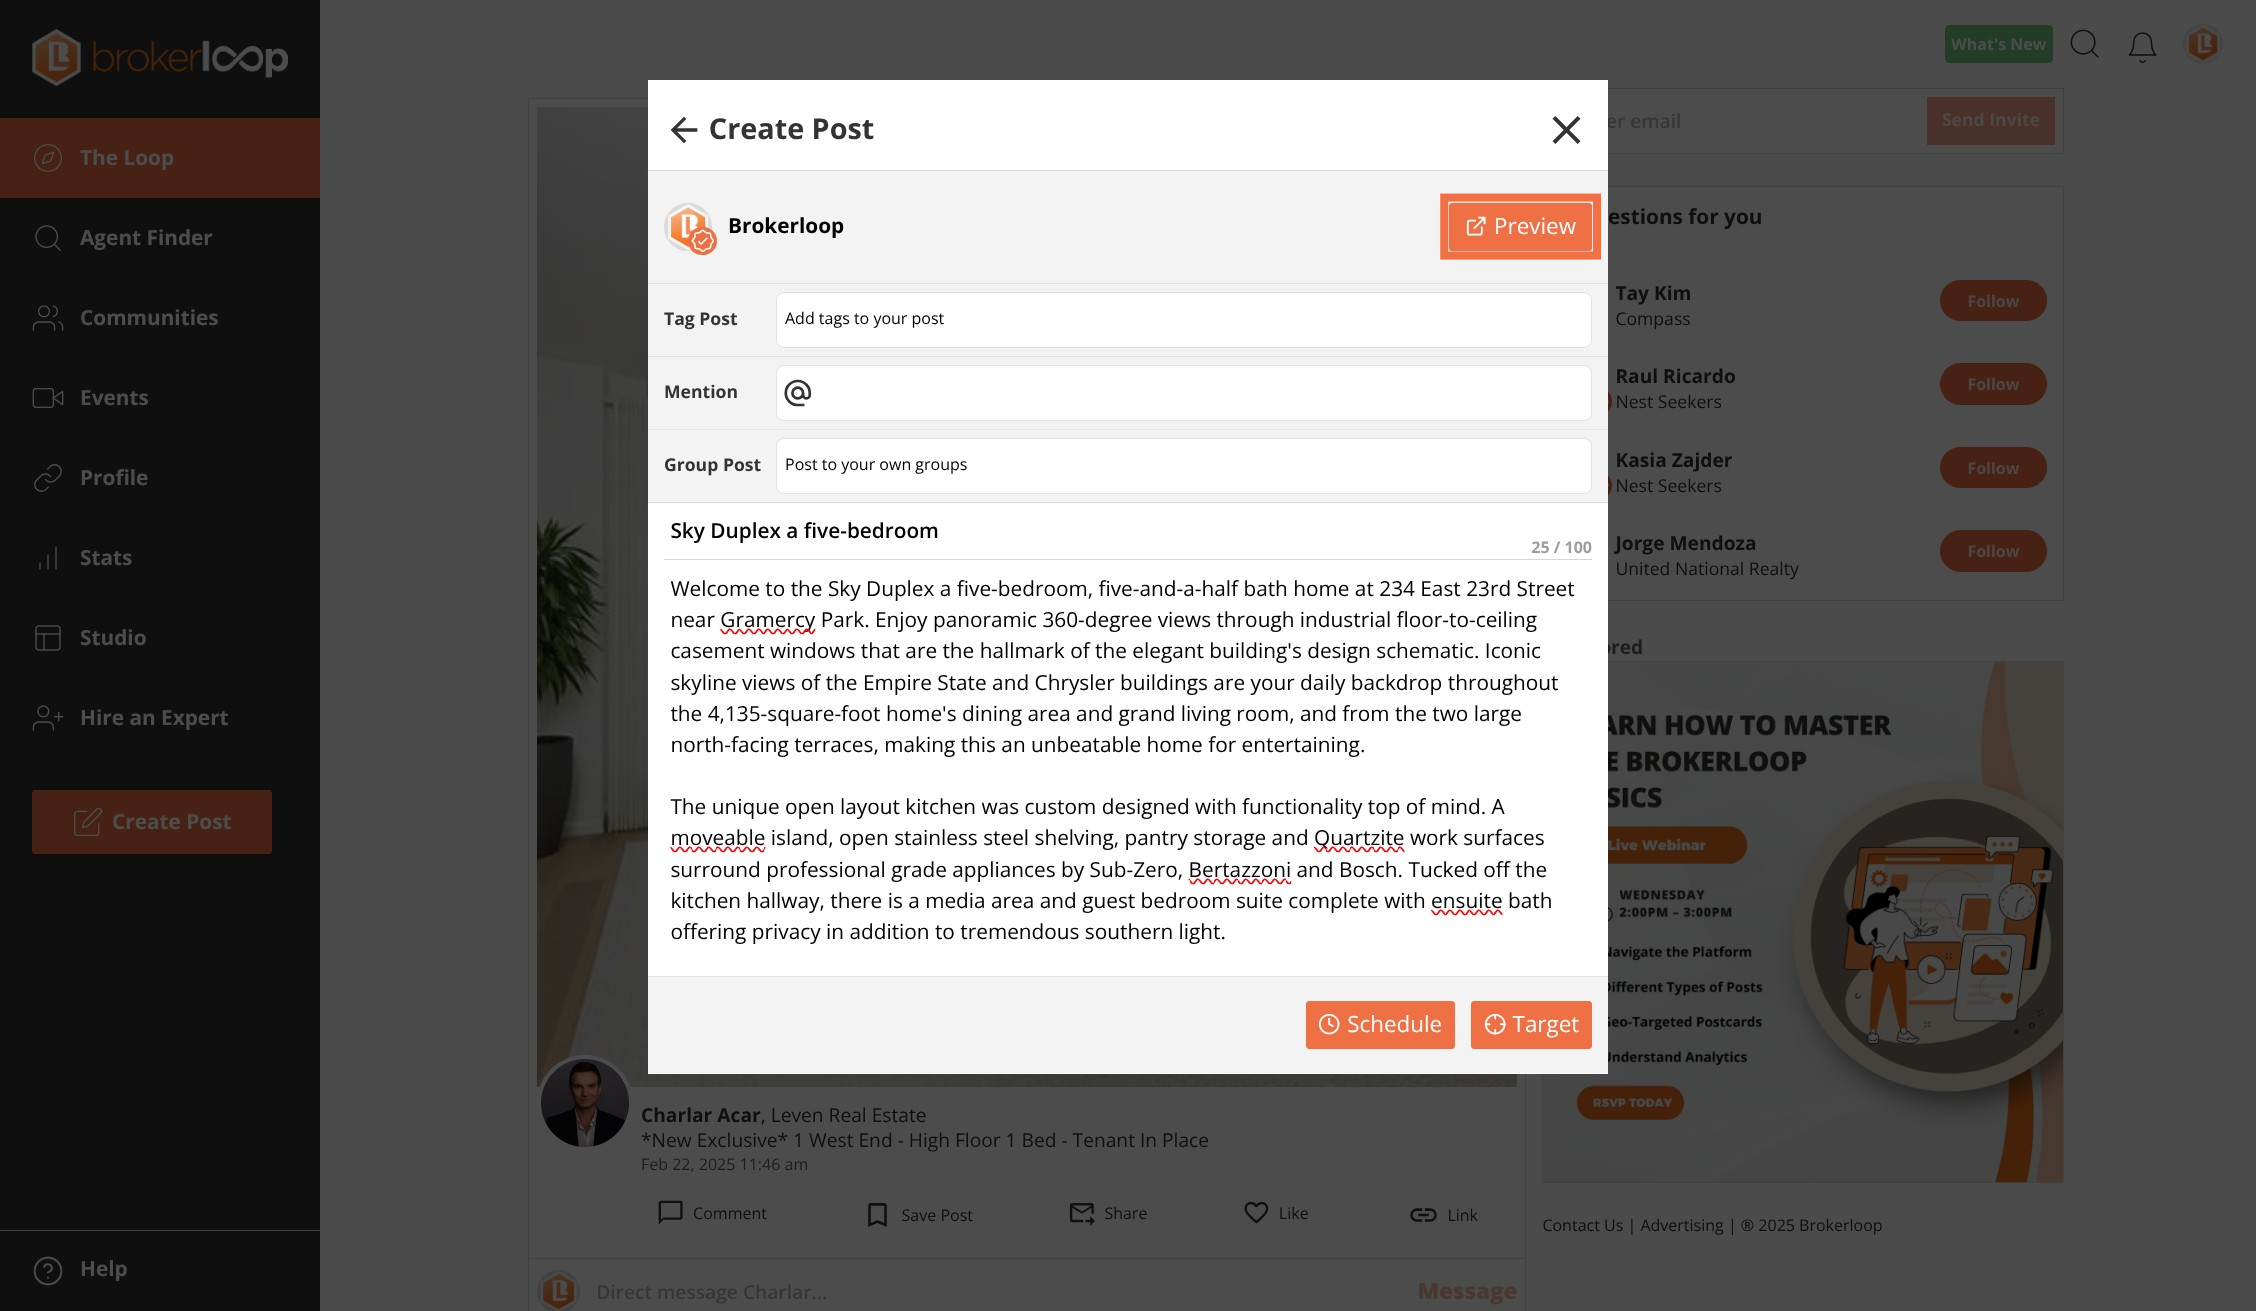
Step 4: Edit your post then Click Preview button
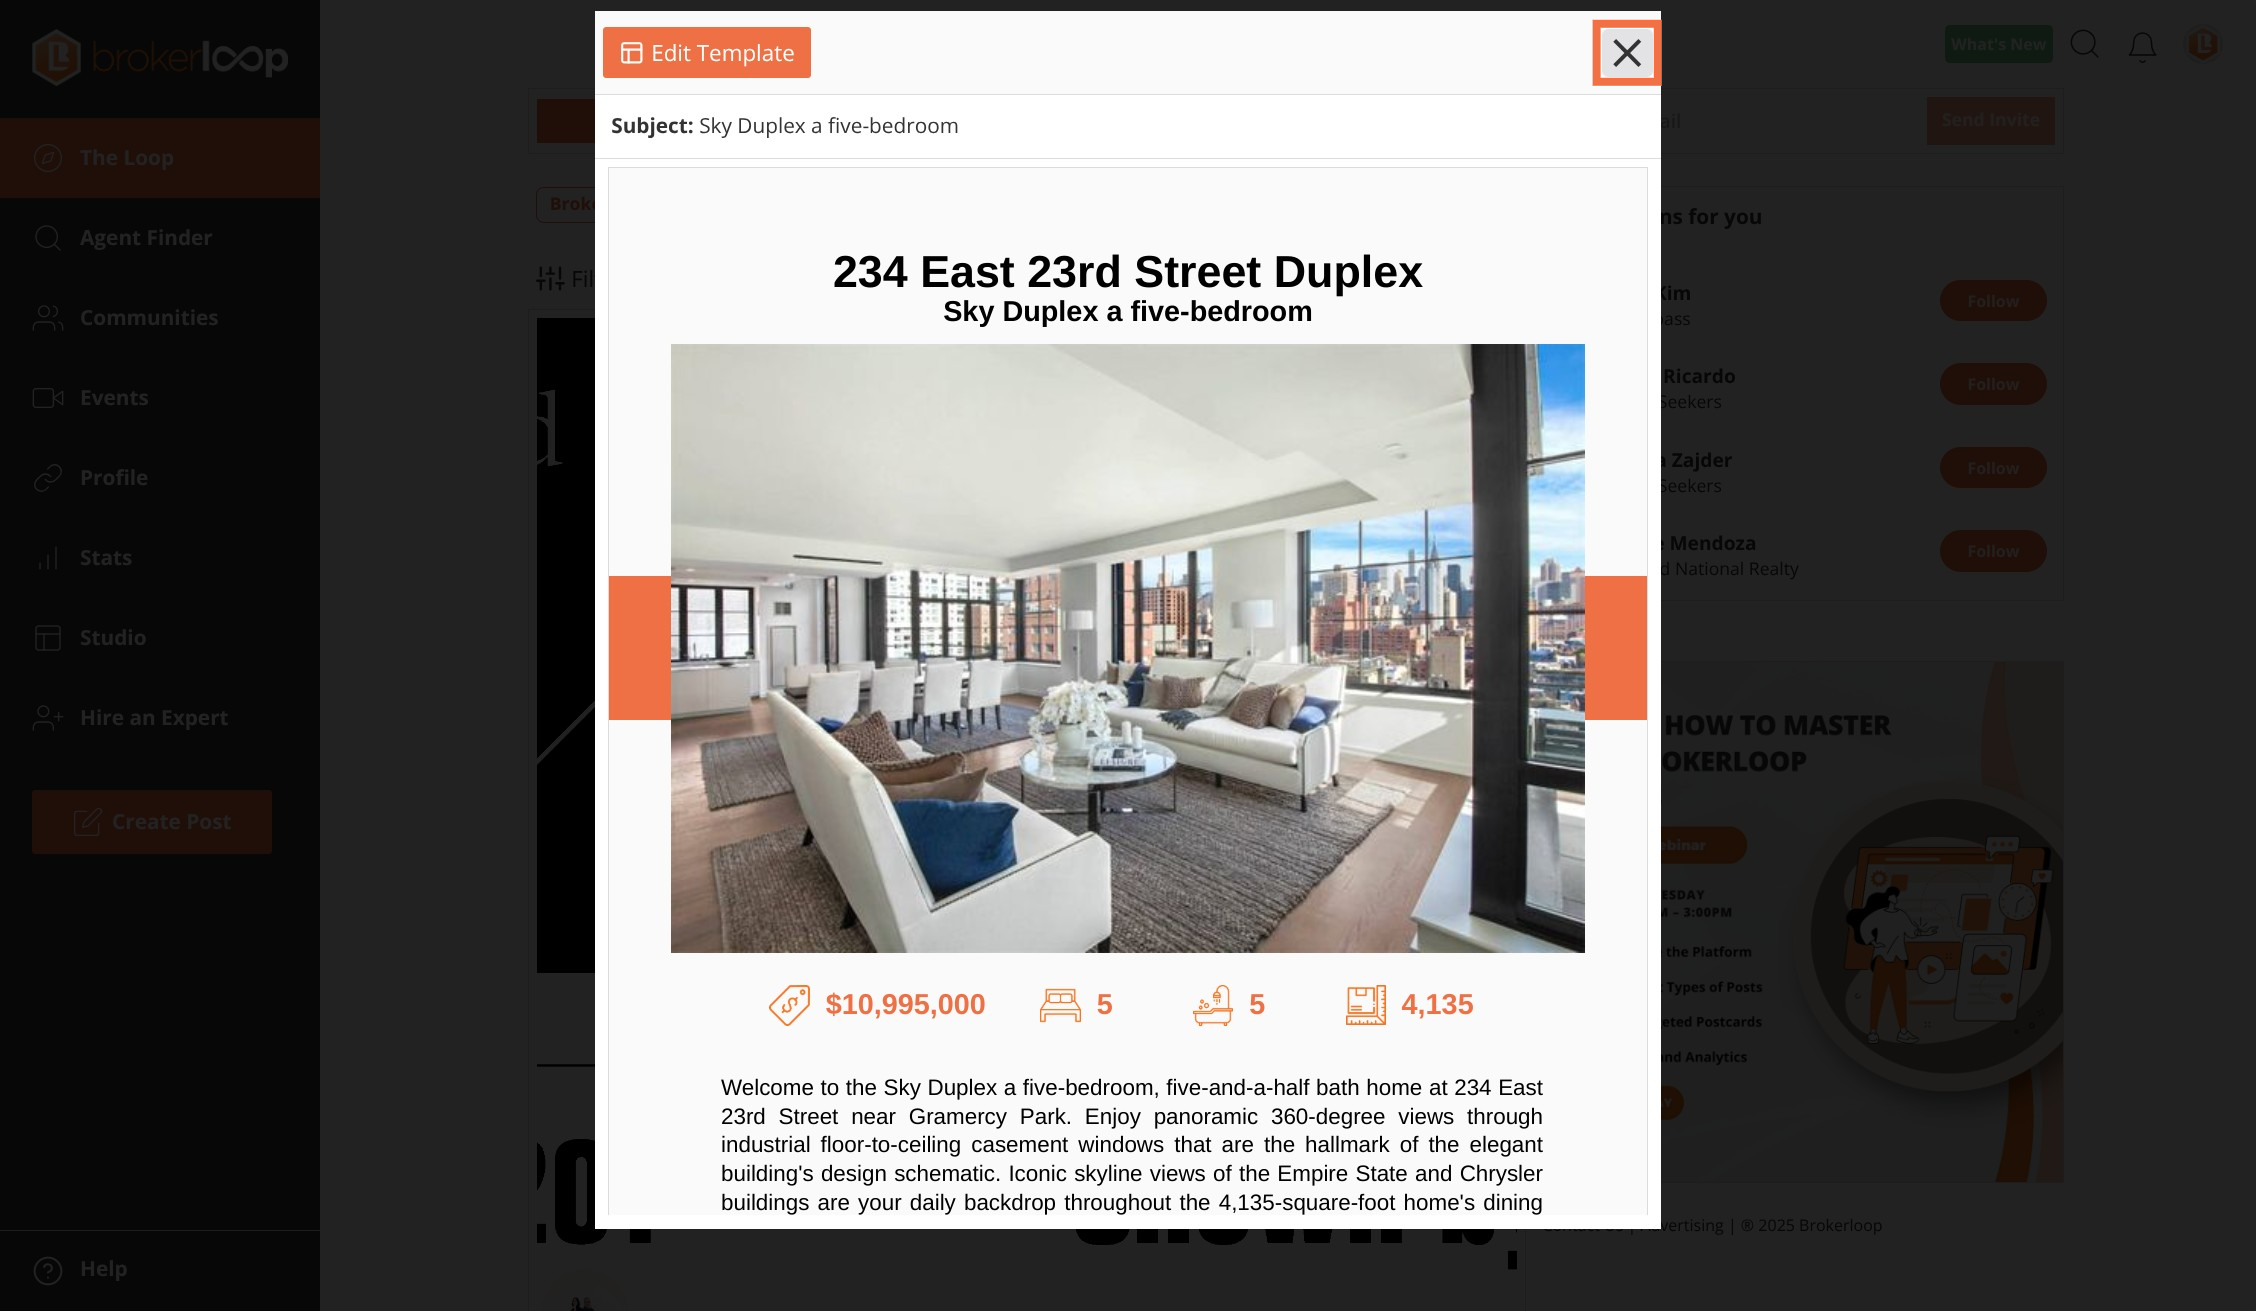
Step 5: Close preview once finished reviewing
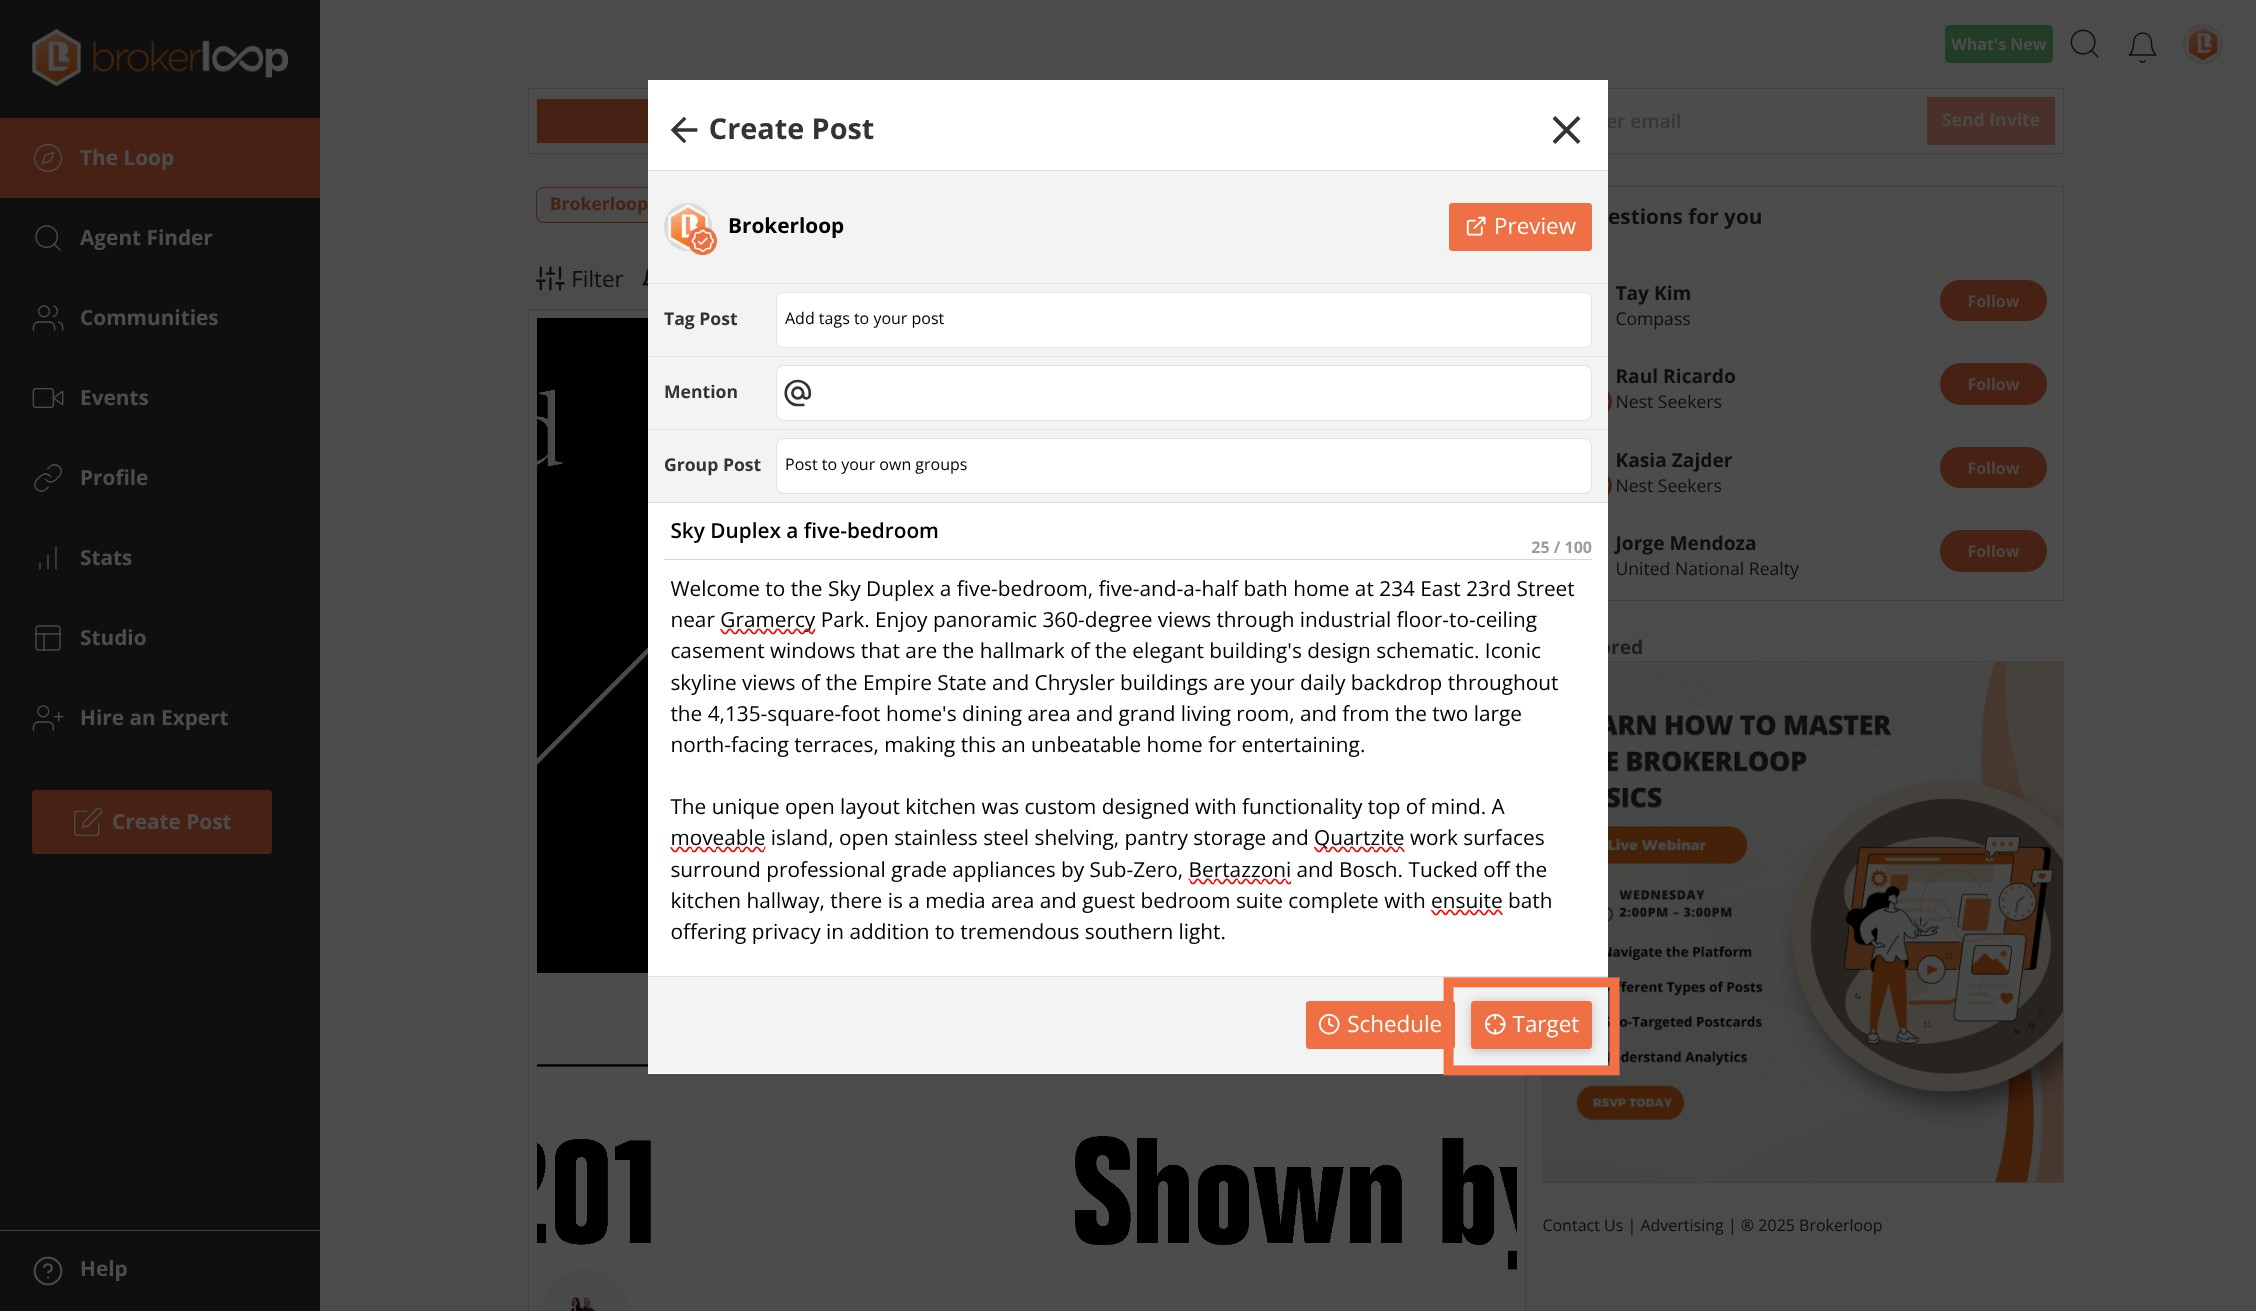
Step 6: Click Target button
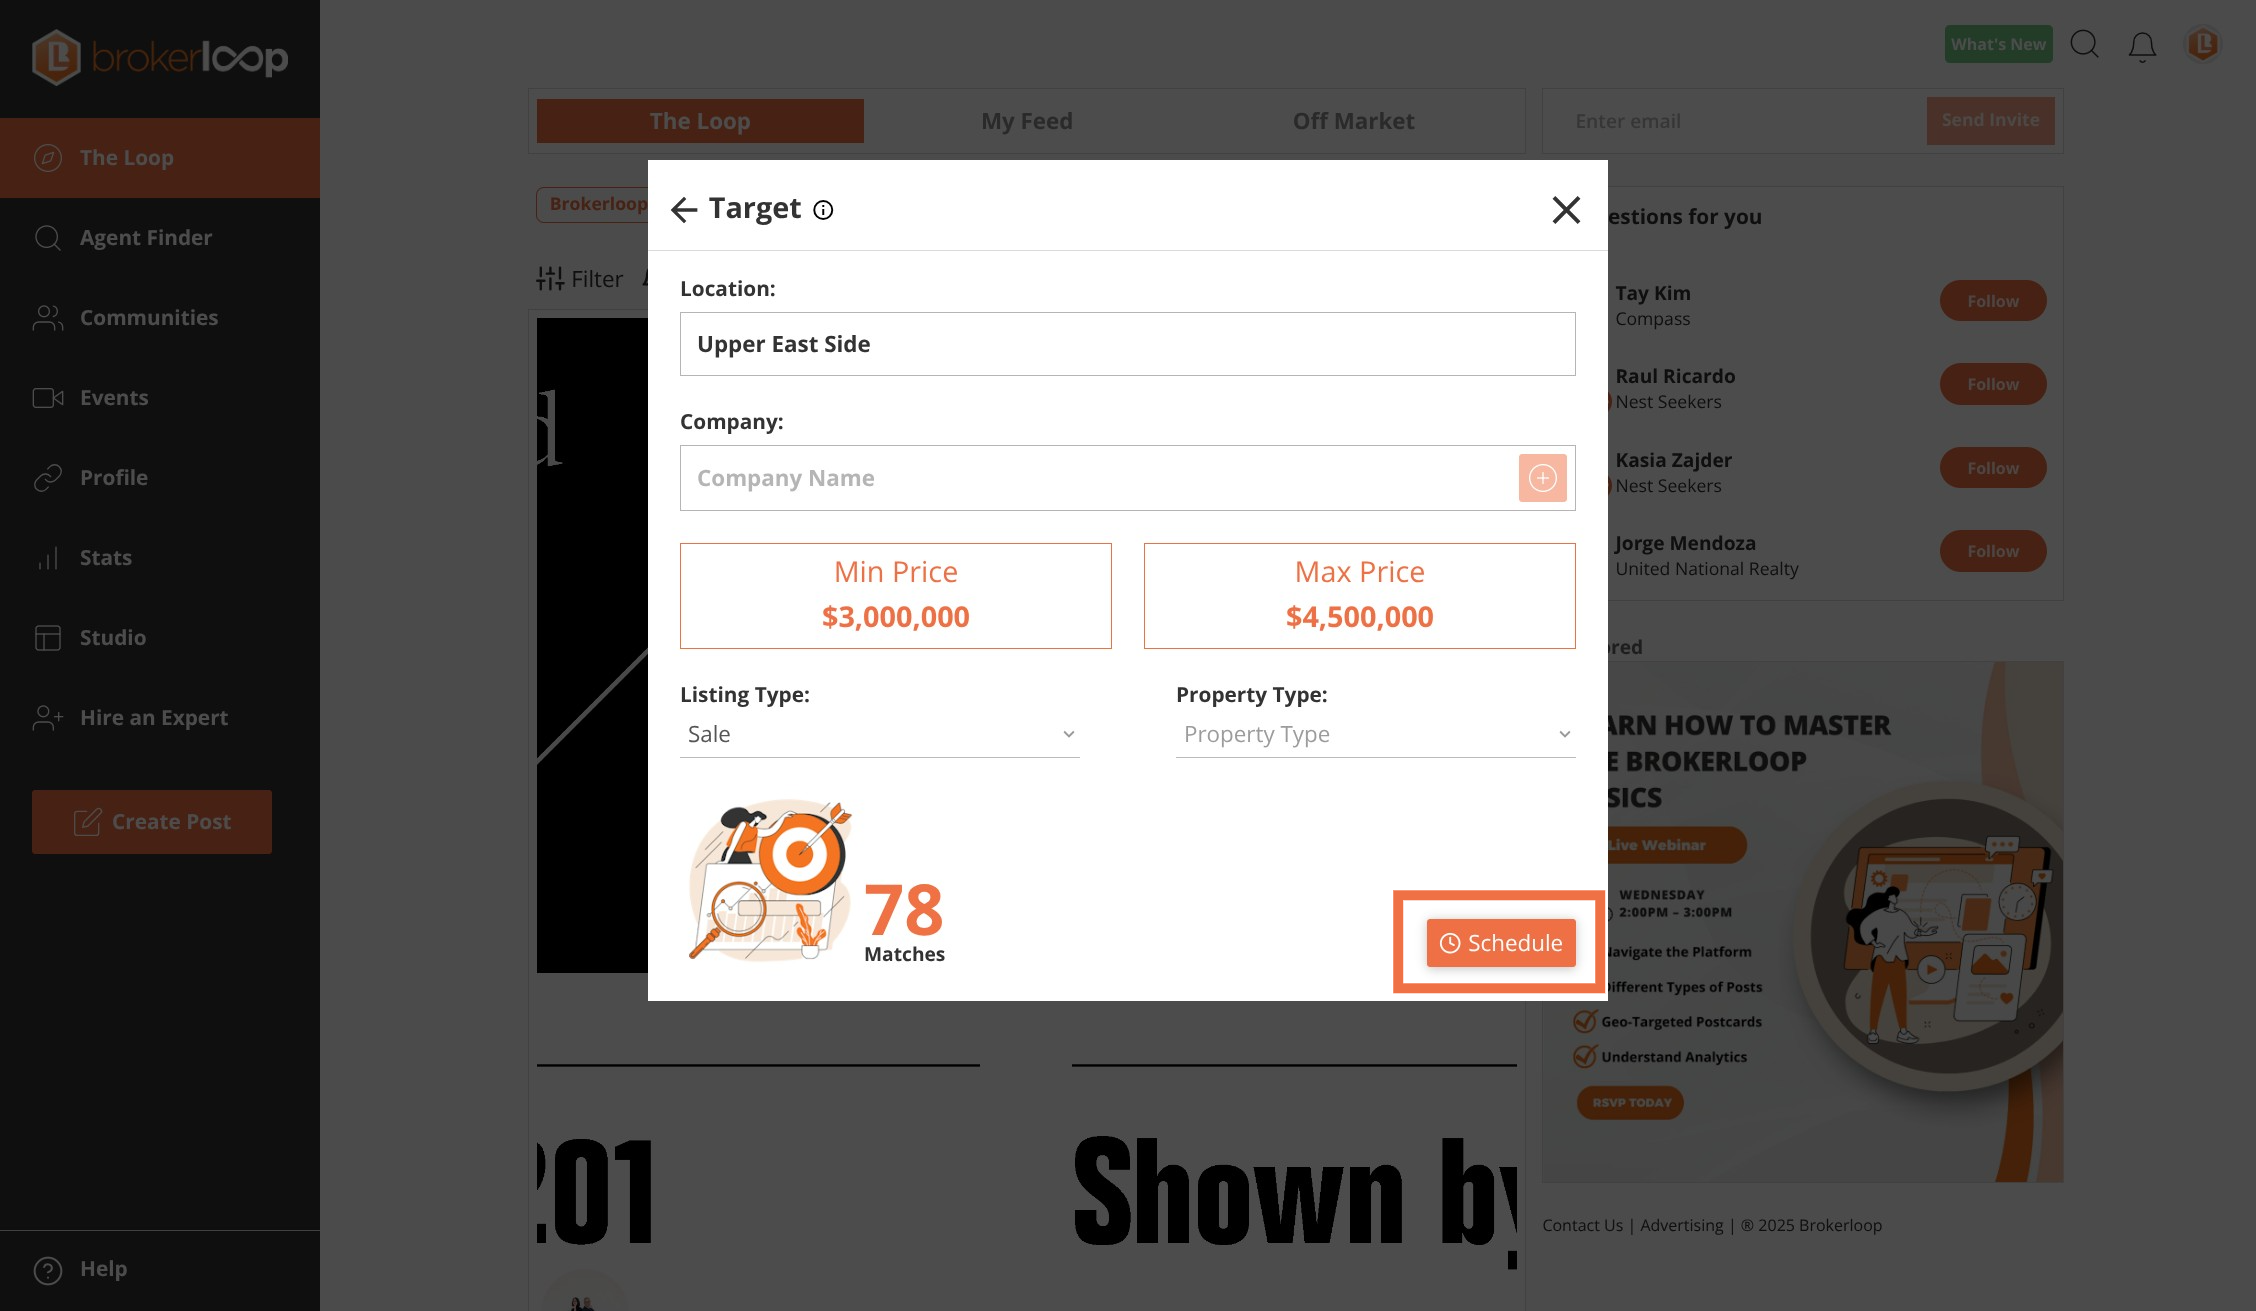
Step 7: Enter search criteria

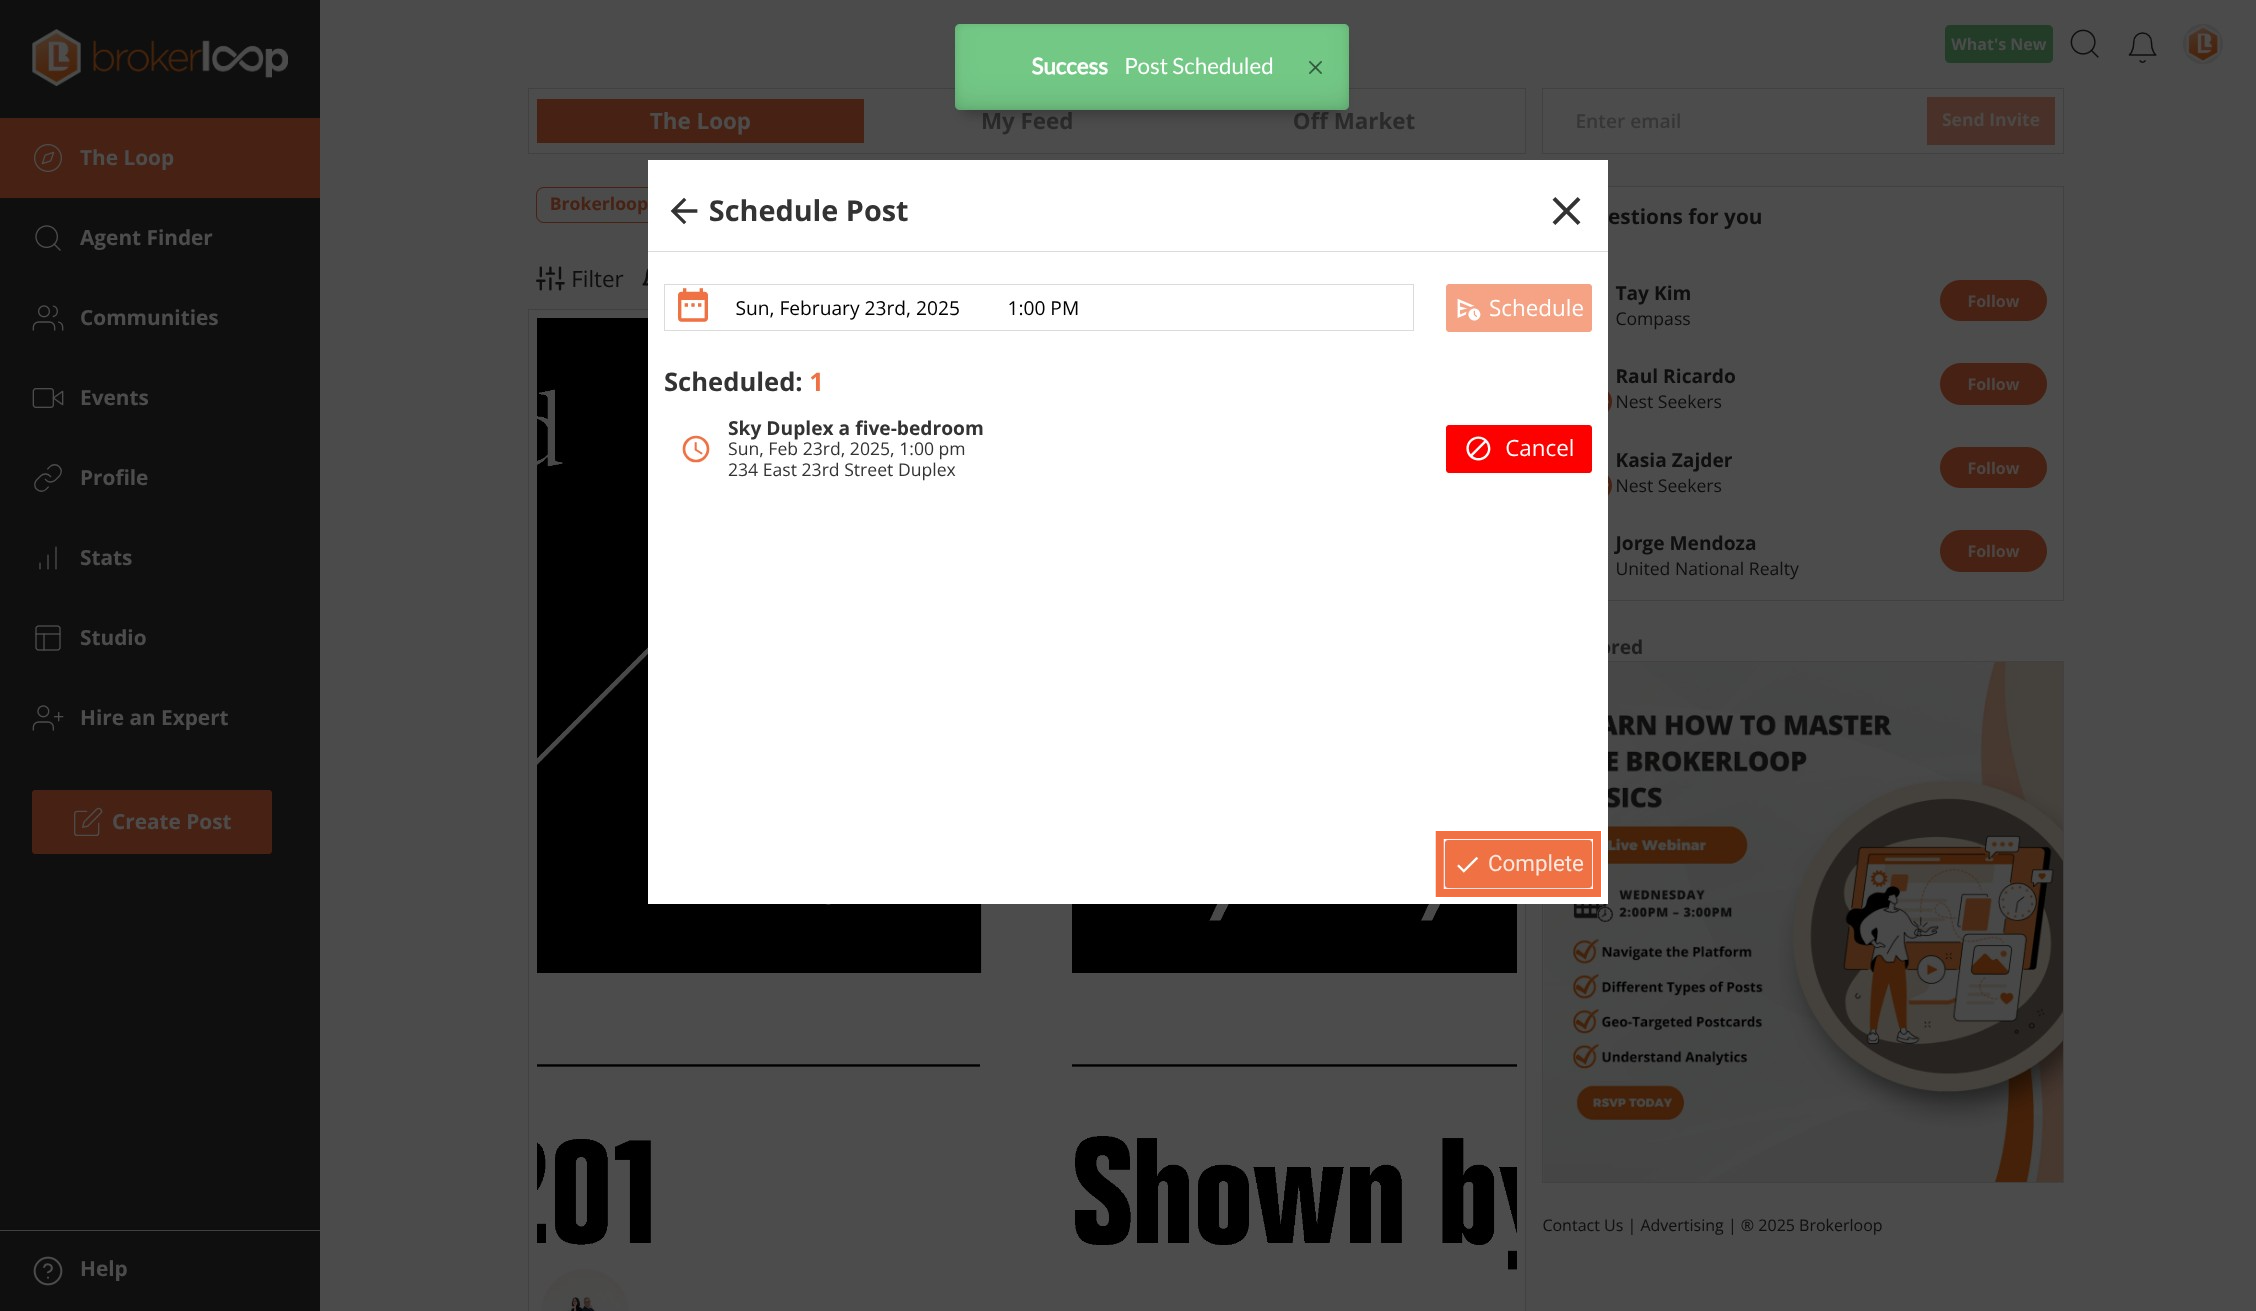
Step 8: Click Schedule button
Step 9: Select a date and time to schedule your post
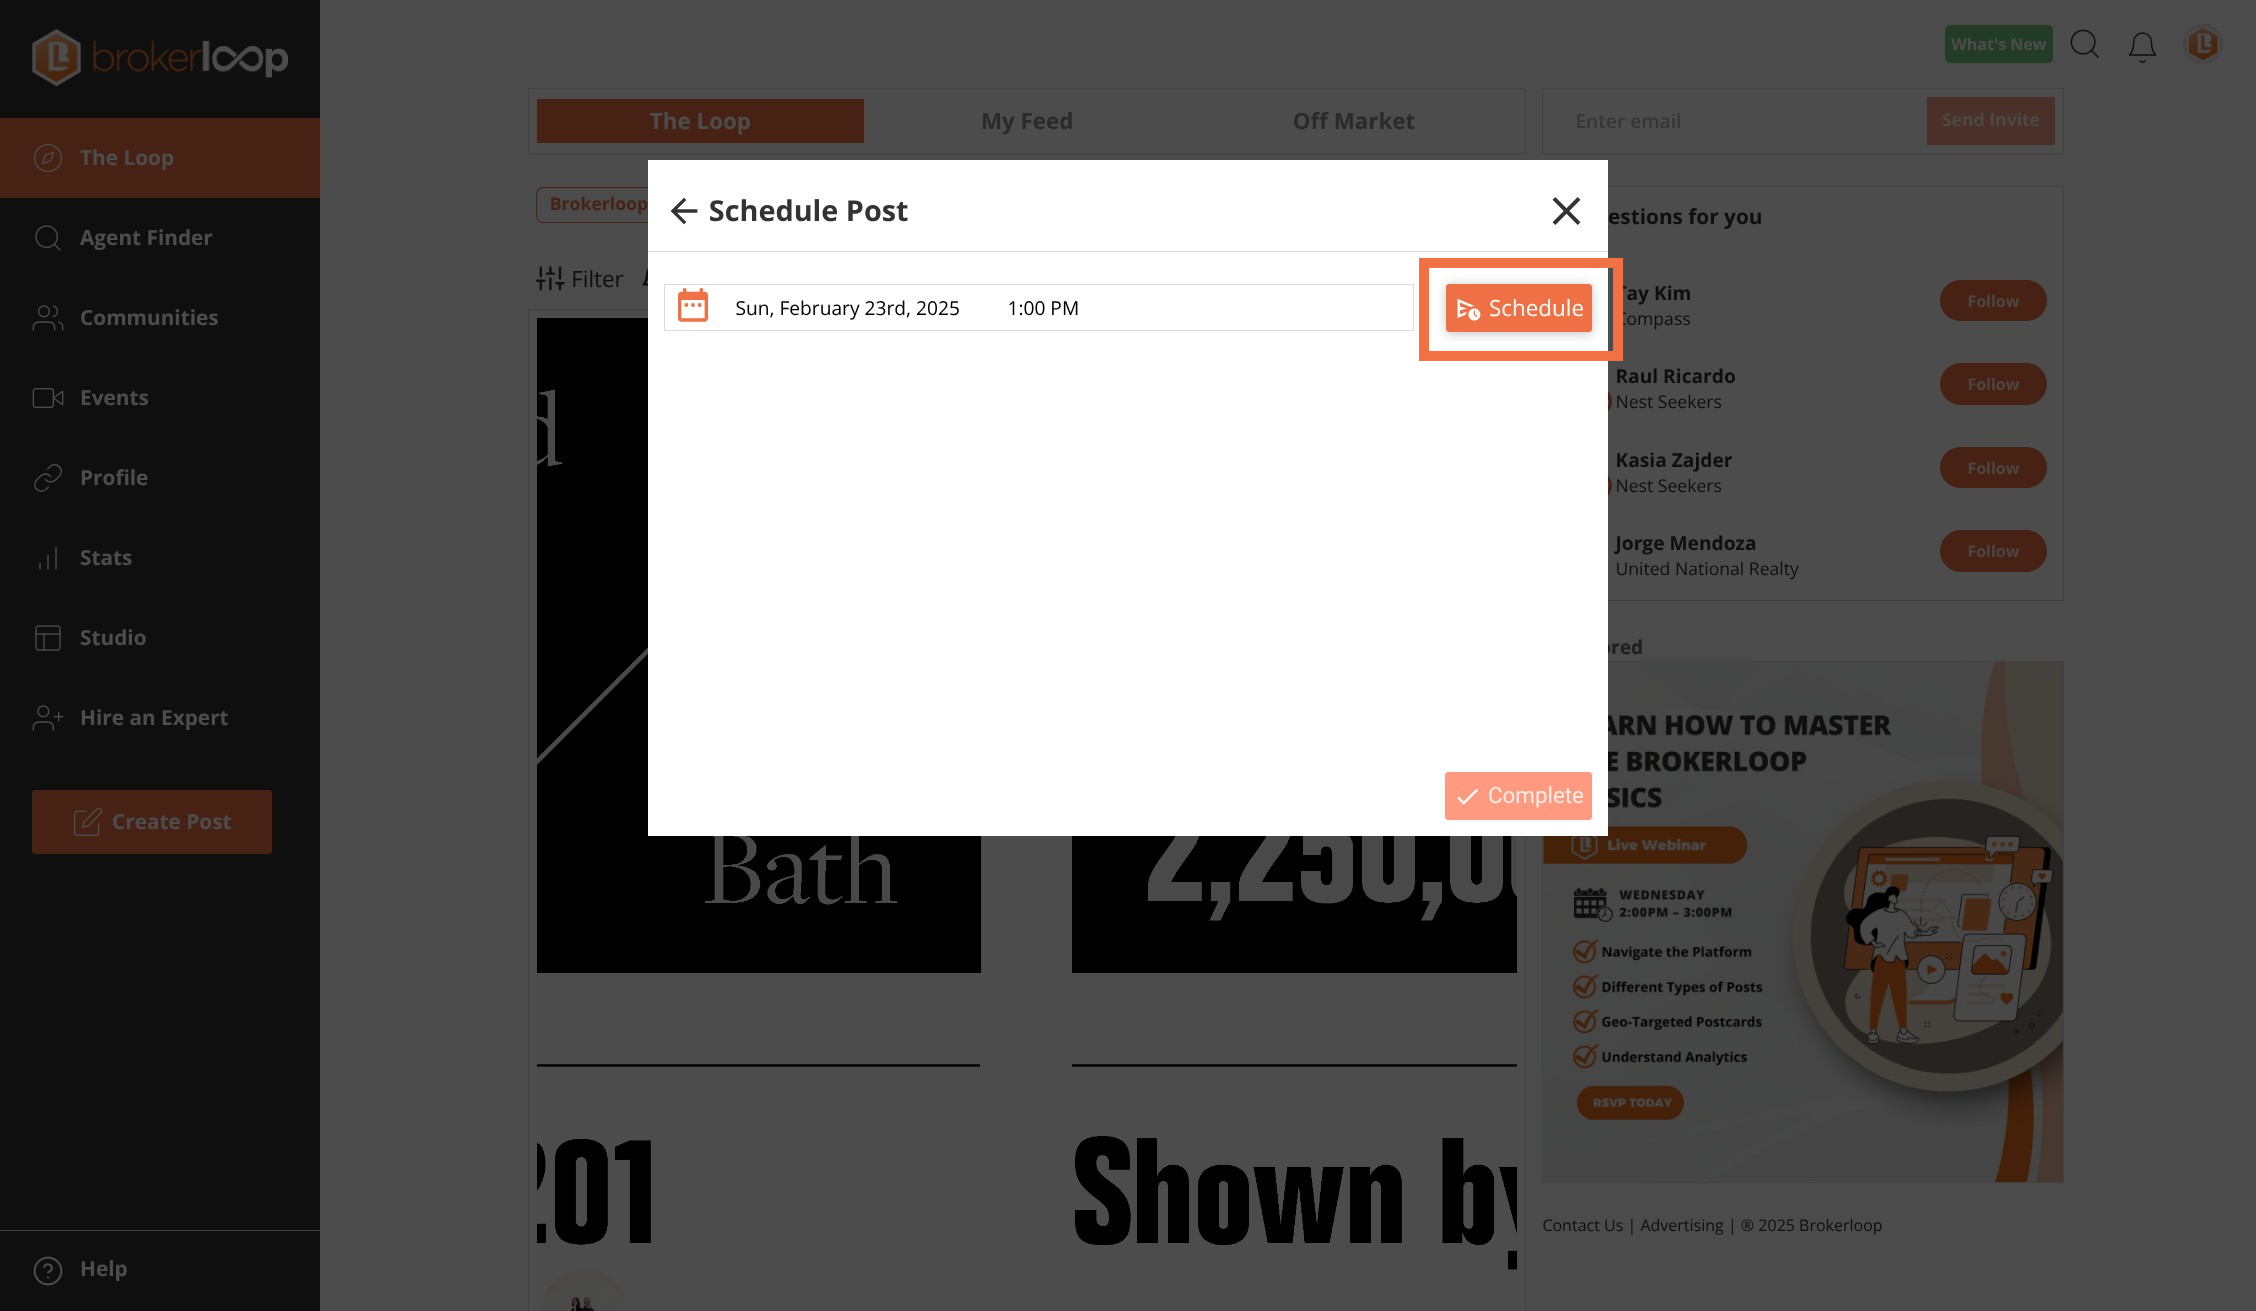
Step 10: Click Complete button